Textured Crop With Scissors: A Step-by-Step Plan
Consult, set the sides, cut the fringe line, point cut the top and texture in small passes, with the checks that keep it tidy.
Quick answer
Cut a textured crop in this order: agree the reference, set the sides and transition, cut a clean fringe line, point cut the top to break it up, add any toothed-shear texture in small test passes, then cross-check in the state the client will wear. Plain cutting shears can do the whole cut.
Top picks
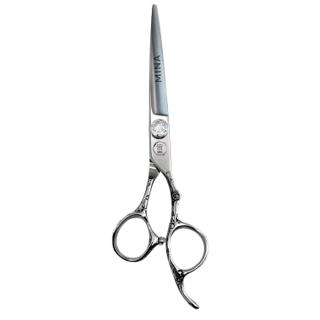
Cutter for the line and point cutting
Mina Sakura II Hair Cutting Scissors
Convex edge, SUS440C, 5.0″ to 7.0″
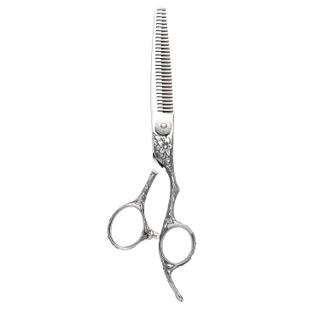
Toothed shear, if the top needs it
Ichiro Premium Series: Sakura Hair Thinning Scissors
440C, offset, 6.0″
A textured crop is a short sides-and-cropped-top cut with a visible fringe and some separation on top. The order of work matters more than the tool: shape first, texture second. Here is a plan you can run on a real head, with the checks that keep it tidy.
Key takeaways
- Shape first, texture second. Texture cannot rescue a wrong line.
- Point cutting does most of the texture work with ordinary shears.
- Toothed shears are optional. Use the model’s own stated cut rate, not the tooth count.
- Cross-check from a second direction and in the state the client will wear.
- If hair folds instead of cutting, stop and check the tool before you blame the technique.
What do you agree before you pick up the shears?
Agree the reference image, the shortest length at the sides and the fringe length. “Textured crop” and “French crop” overlap, and the exact top and perimeter come from the client’s reference, so photos settle it faster than labels. Confirm what the client likes in the photo, because lighting and styling change how a picture reads. The consultation scripts have the questions.
Check density and fall while you talk. Part a few small areas in the same light and compare. Scalp showing through is a visual cue, not a measurement. Note how the fringe falls on its own before you touch it.
How do you cut it, step by step?
Work in this order and check at the end of each step.
- Set the sides. Clippers, scissor-over-comb or a planned mix all work. Build the transition up to where the top begins and leave it blended. The fade blending guide covers the transition.
- Section the top. Clip the sides away and work the top in clean, small sections.
- Cut the fringe line. Use a blunt cut to put in a firm, clean line at the length you agreed. Check it level against the face.
- Cut the top to length. Match each section to the fringe line so the top flows into it.
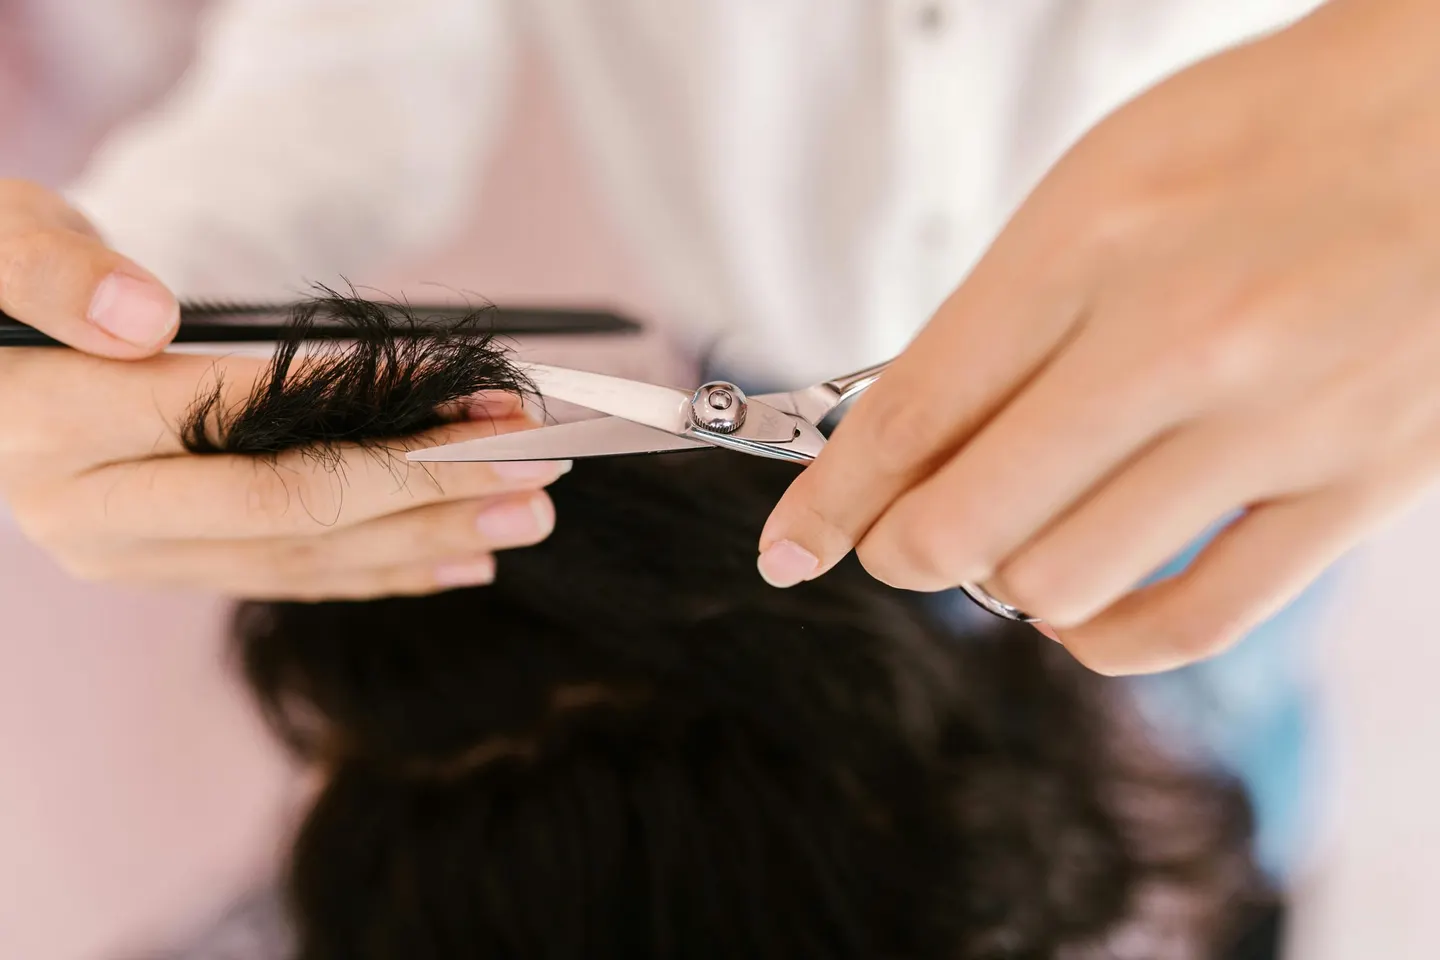
- Point cut to break it up. Turn the tips into the ends and snip upward. Shallow bites soften the line. Deeper bites remove weight and create separation.
- Add texture only if needed. If the top still sits like a block, use a toothed shear or channel cutting (small gaps cut for separation). Go slowly.
- Dry, style and cross-check. Look at it in the state the client will wear, comb it in another direction and fix patches with light passes.
Point cutting terms vary. Some schools treat chipping as a separate, more angled move, and others use “point cutting/chipping in” as one label. Describe your entry and depth to a colleague rather than trusting the name; barber lingo decoded lists the other phrases that drift.
How deep and how many bites?
The result depends on four things: the depth of the bite, the direction you enter, the spacing and the section width. Close, even bites read soft. Wide or irregular bites read chunky. Take one pass and look before you take a second. Removing too much from the ends can make coarse straight hair stand out and curly hair expand, so adjust your plan to the head. Texturising technique for barbers covers how much to remove by hair type.
What do you check on the shears first?
Check four things before the client sits down:
- Tips meet. Close the shears gently and look at the points. If they do not meet cleanly, hair folds at the end of every close.
- Tension. The blades should not separate mid-cut. A loose pivot pushes hair instead of cutting it.
- Clean pivot. Product and old oil gum the action and mimic dullness.
- Toothed shear model. If you plan to use one, find the maker’s stated cut rate for that exact model. Two toothed shears with the same tooth count can remove very different amounts, so strand-test in a low-risk spot.
If hair still folds after tension and cleaning, the edge needs a qualified professional sharpener, and the blunt shears guide shows the signs. Thinning versus texturising scissors explains which toothed shear suits which top.
Which mistakes ruin a crop?
- Texturing before the line is set. You hide a bad shape under a messy one.
- Heavy bites at the ends of a short fringe. It looks thin and stringy.
- Stacking passes in one place. Several closes in one zone leave a visible gap.
- Judging wet hair only. Wet hair stretches. Check how it falls dry.
- Matching the toothed shear to the label. “Texturiser” and “blender” are loose names. Go by the model.
Cut names explained shows where the crop sits among the other cuts, and the thinning shears collection lists toothed models by tooth count. More barber guides sit together in the knowledge base, and the barber scissor FAQ answers the questions people ask most.
Further reading: Scissorpedia is an information website and a fellow member of the ShearAlliance.
Questions
Can I cut a textured crop with plain scissors?
Yes. A cutting shear can build the line and break it up with point cutting. A toothed shear is optional, for bulk or extra separation.
Is point cutting the same as chipping?
It depends on the school. Some separate them by entry angle, others use the terms together. Describe the movement you mean to the person you are working with.
How much weight should I take out of the top?
Start with less than you think and look after each pass. Hair you remove cannot be put back.
Does thick hair need a toothed shear?
Not automatically. Density, strand thickness and the result you want decide it, and so does the model's stated cut rate.