5 Scissor Mistakes Apprentice Barbers Make

Quick answer
The five mistakes are buying a kit before you have the course tool list, starting on a 7.0″ shear before you control the tip, buying the wrong hand, fiddling the tension screw, and storing scissors wet or loose. Each one costs money or an edge. All five are easy to avoid in your first month.
Most apprentice scissor problems come from five habits, not from the scissor. Fix these early and a mid-priced cutter will carry you through your apprenticeship.
1. Buying the kit before you have the tool list
Training providers set what you need, and some supply part of it. TAFE Queensland tells barbering students to wait until after orientation before buying tools. Box Hill Institute supplies kits on the first day. Buy first and you can end up with two cutters doing the same job.
Ask your trainer and your employer what you must own, what the shop lends and what you need for the first practical session. Then buy the cutter on the list. Take a blank trainer feedback record (PDF) or plain-text version from the record library to note what they tell you. The first professional kit guide sets out the order: cutter, case, thinner, then specialist tools.
2. Going long before you control the tip
A 7.0″ shear looks like the barber’s tool, and for scissor-over-comb it is. For your first months of point cutting and detail work it is a lot of blade to steer. Start on 5.5″ or 6.0″ and move up when your trainer puts you on longer sections.
The size guide shows which length suits which job. When you are ready for reach, the scissor-over-comb guide covers the longer lengths.
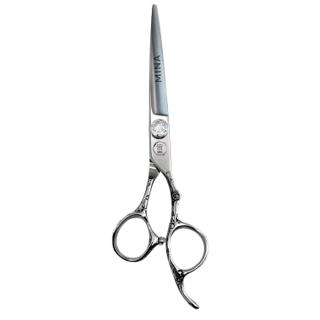
First cutter: 5.0″ to 7.0″, offset, convex edge
Mina Sakura II Hair Cutting Scissors
In stock: 5.0″, 5.5″, 6.0″, 6.5″, 7.0″
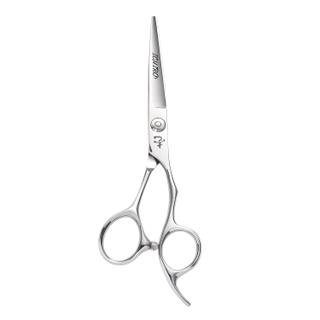
Apprentice cutter: 5.5″ convex or 6.0″ micro-serrated
Ichiro Ergo Apprentice Hair Cutting Scissor
In stock: 5.5″, 6.0″
3. Buying the wrong hand
A right-handed shear in a left hand cuts badly however good it is. The blades are set so the grip squeezes them together; in the other hand the grip pushes them apart and the hair folds instead of cutting.
If you cut left-handed, buy a true left-handed pair and check the hand on the thinner too. Our left-handed buying guide lists the current options.
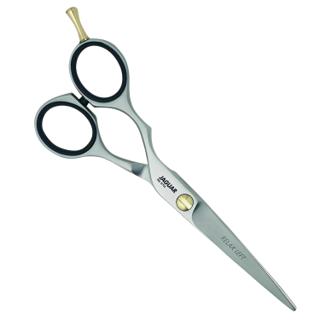
4. Fiddling the tension screw
New apprentices tighten the screw when hair folds and loosen it when the action feels stiff. Both are often the wrong fix. Too tight wears the edges against each other; too loose lets the blades open up and fold hair.
Do the drop test instead: hold the finger ring, tips up, lift the thumb blade to 90 degrees, let go. This is one common method, and makers describe the target differently, so follow your maker’s instructions for your model. Adjust in small steps, and if the pair still folds hair at the right tension, it needs a sharpen, not more turning. The tension and pivot guide explains each screw type.
5. Putting scissors away wet or loose
Water and hair left in the pivot are what dull a shear between sharpenings. A loose pair in a drawer or bag gets knocked, and one drop on a tiled floor can mark a convex edge.
Wipe the blades dry after each client, oil the pivot at close and keep the pair closed in its own slot. The daily maintenance routine takes two minutes. A single pouch or a four-slot case costs less than one sharpen.
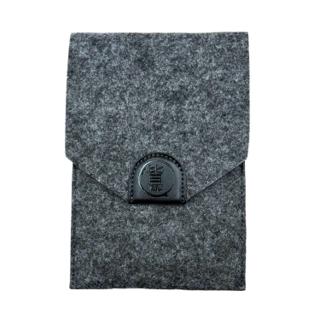
Four-slot case for a first kit
When it is the scissor, not you
If a pair that used to cut cleanly starts pushing or folding hair at the right tension, it is blunt. If it was dropped and now catches at one point, stop using it. Both need a sharpener, not more adjusting. The blunt shears guide shows the signs and the sharpening guide covers what to ask a service.
Pick by stage
- First month: one 5.5″ or 6.0″ offset cutter in your hand, plus a case. See the apprentice scissor picks.
- Second year: add a thinner and a 6.5″ or 7.0″ for scissor-over-comb. The second scissor guide covers the order.
- Qualified: upgrade the cutter you use most and keep the first pair as a backup.
More first-month answers are in the ten questions apprentices ask about scissors.
Questions
What length scissors should an apprentice barber start with?
A 5.5″ or 6.0″ offset cutter. It covers point cutting, clipper-over-comb finishing and detail work, and the tip stays where you put it. Add a 6.5″ or 7.0″ for scissor-over-comb once your trainer has you working longer sections.
Should I buy a scissor kit before my barbering course starts?
No. Get the tool list first. TAFE Queensland tells barbering students to wait until after orientation, and other providers supply some tools on day one. Buy the cutter the list asks for, then add pieces as the work needs them.
Can a left-handed apprentice use right-handed scissors?
Not well. The blades are set for the hand that holds them, so a left-hander squeezing a right-handed shear pushes the blades apart and the hair folds. Buy a true left-handed pair from the left-handed collection.
How tight should my scissor tension be?
Hold the shear by the finger ring, tips up, lift the thumb blade to 90 degrees and let go. This is one common method, and makers describe the target differently, so follow your maker's instructions for your model. If it slams shut it may be loose; if it barely moves it may be tight. Adjust in small steps only.
How often should an apprentice clean and oil their scissors?
Wipe them dry after every client and before they go in the case. Put a drop of oil on the pivot at the end of the day, open and close a few times, then wipe off the excess.